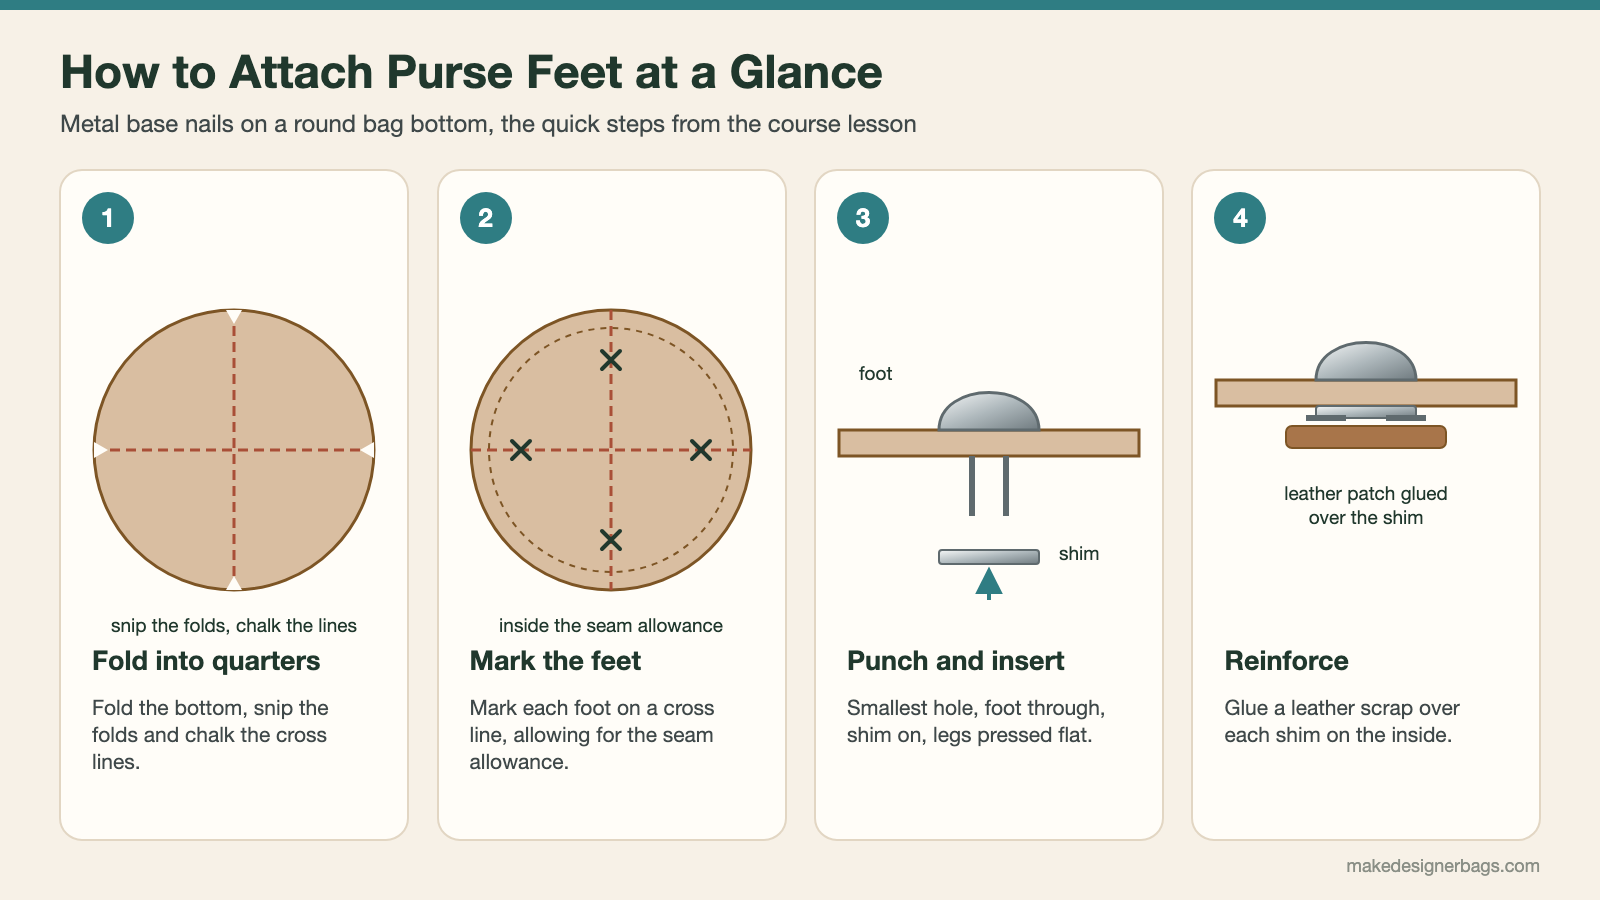
To attach purse feet, fold the bag bottom into quarters to find the center lines and chalk them, then mark the position of each foot on those lines, allowing for the seam allowance. Punch a small hole at each mark, push the foot through, put a shim over the metal legs and press the legs flat. For a firm hold, glue a small piece of leather over each shim.
Purse Feet at a Glance
| Step | What you do | Why it matters |
|---|---|---|
| 1 | Fold the bottom into quarters and snip the folds | Finds the exact center lines |
| 2 | Chalk the cross lines and mark each foot | The feet line up evenly |
| 3 | Punch a small hole at each mark | The legs go through cleanly |
| 4 | Insert the foot, add a shim, press the legs flat | The legs cannot scratch or poke through |
| 5 | Glue leather over each shim | The foot stays firmly fixed |
Purse feet, also called base nails or metal feet, give a bag a professional look. They also protect the bottom of the bag from everyday wear, so your work stays looking good for longer.
What You Need
Purse feet, one per marked spot
A shim for each foot; if none came with the feet, cut small ones from leather scraps
Chalk
Hole punch pliers, set to the smallest hole
Leather scraps and leather or fabric glue
Step by Step
Fold and Mark the Quarters
Fold the bag bottom in half edge to edge and snip a tiny notch at each fold. Fold again to find the other two quarter points and snip those too. Now you have four equal quarters. Draw chalk lines from notch to notch to make a cross.
Mark the Feet
Mark the position of each foot on the cross lines. You can decide how far in the feet should sit, but always allow for the seam allowance, so the feet do not end up too close to the edge once the bottom is sewn in.
Punch, Insert and Secure
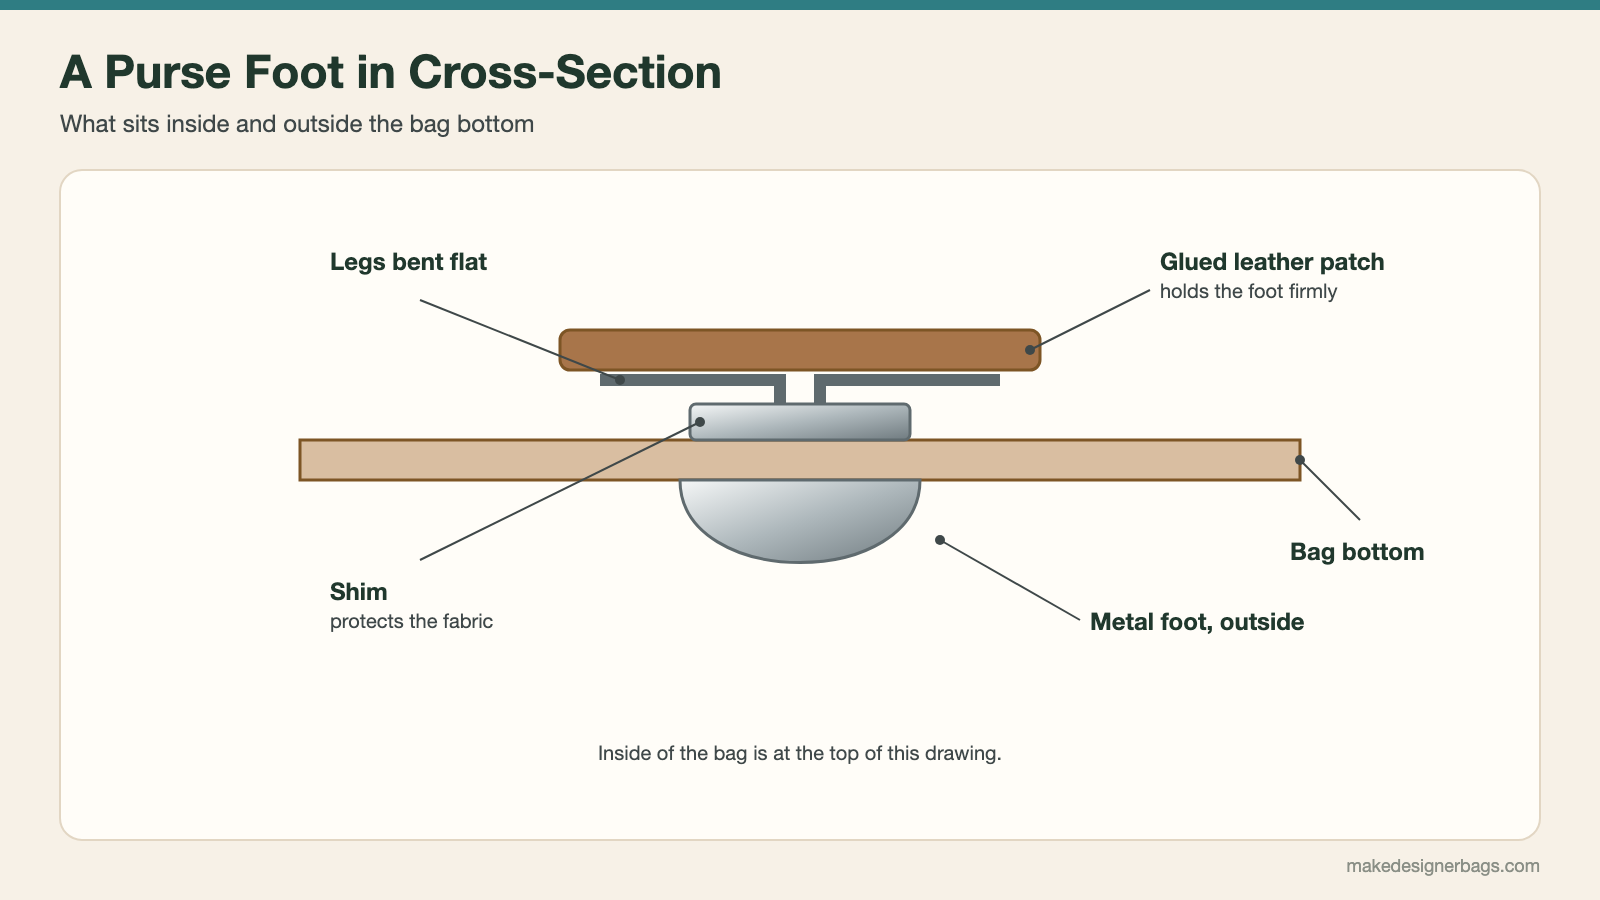
Punch a hole at each mark with the smallest setting of your hole punch. Push a foot through from the outside with its two small metal legs, put a shim over the legs on the inside and press the legs outward and flat. If your feet came without shims, punch a small hole in the middle of a leather scrap and use that as a shim.
Reinforce With Leather
Cut a slightly larger piece of leather for each foot, put glue on the back and glue it over the shim. That fixes each foot well. Then carry on with the bag bottom as usual.
Fold and chalk-mark the bag bottom carefully before you punch any holes, so the feet line up evenly.
Common Mistakes
Without a shim, the metal legs can scratch or poke through the fabric.
If the quarters are not marked accurately, the feet end up off-center or unevenly spaced.
Feet placed without allowing for the seam allowance end up too close to the edge.
Feet are one way to keep a bag looking new. For more, see essential tips for long-lasting bag care.
See It on Video
Attaching metal feet to a round bag bottom is shown step by step in close-up video in the Bag Sewing Fundamentals course. See the bag making courses.
Frequently Asked Questions
What are purse feet?
Purse feet, also called base nails or metal feet, are small metal studs on the bag bottom. They give a professional look and protect the bottom from wear.
How do I place purse feet evenly?
Fold the bag bottom into quarters, snip the folds and chalk cross lines from notch to notch. Mark each foot on those lines.
Do I need a shim for purse feet?
Yes. The shim goes over the metal legs on the inside, so the legs cannot scratch or poke through. You can cut one from a leather scrap.
How do I make purse feet hold better?
Glue a slightly larger piece of leather over each shim on the inside of the bag bottom.