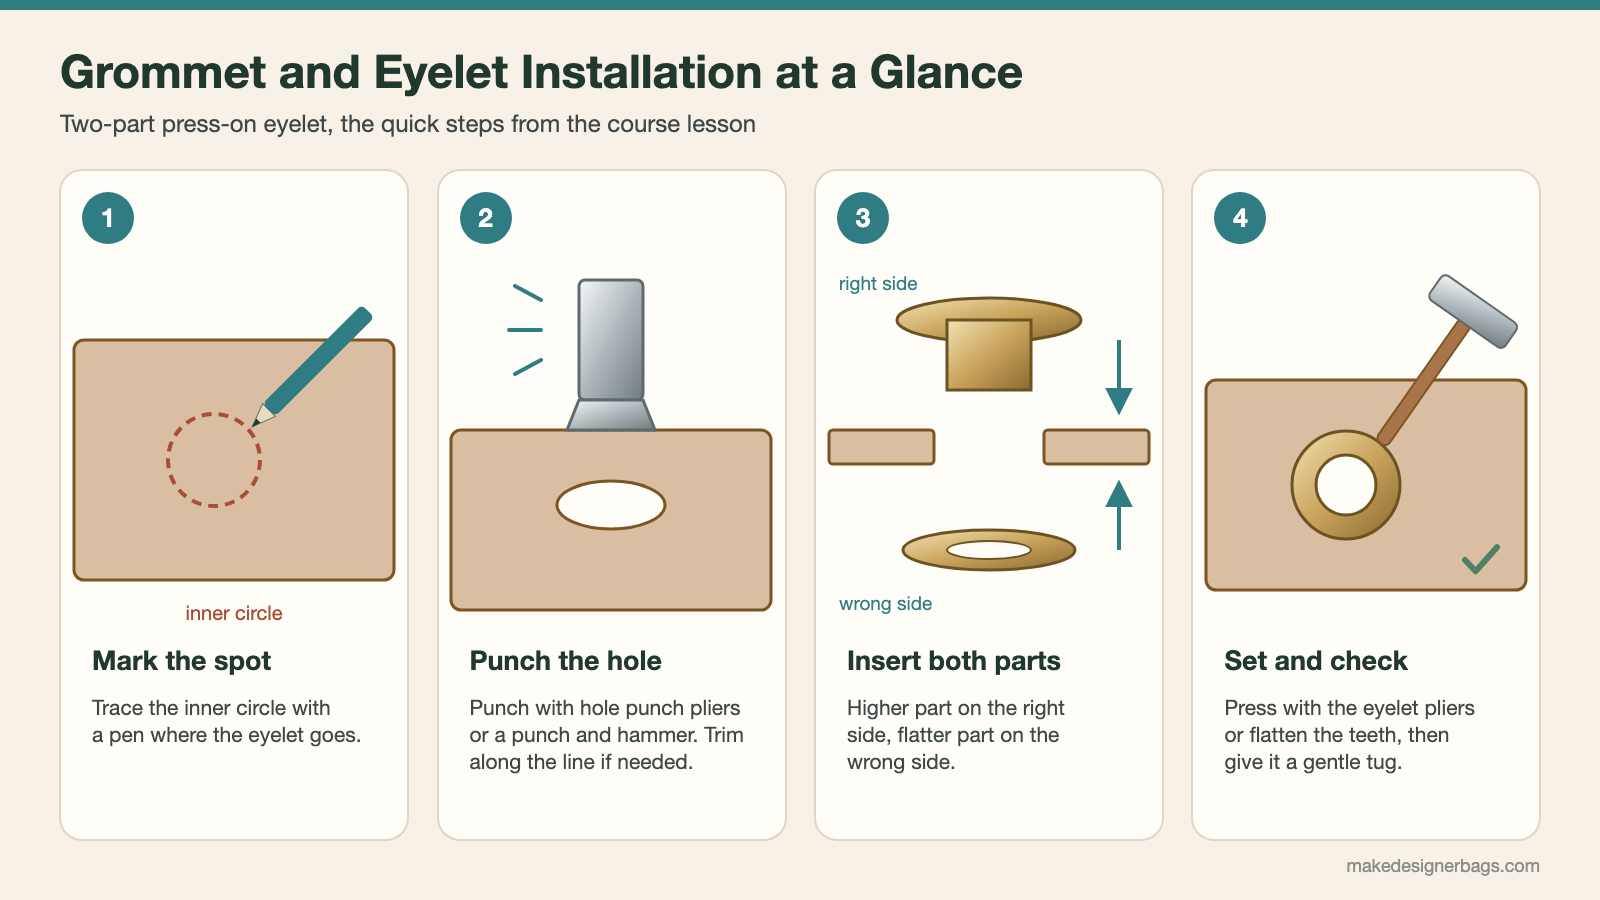
To install a grommet or eyelet on a bag, mark the inner circle where it goes, punch a clean hole through all layers, put the higher part through from the right side and the flatter part on the wrong side, then press the two together firmly. Before you punch into a finished bag, check that the spot is clear of anything inside, such as a zipper pocket. Finish by giving the eyelet a gentle tug to make sure it holds.
Grommet Installation at a Glance
| Step | What you do | Why it matters |
|---|---|---|
| 1 | Mark the inner circle with a pen or chalk | Sets up a hole that is the right size and in the right place |
| 2 | Punch the hole, trim along the line if needed | A clean, round hole lets the eyelet sit securely |
| 3 | Insert the higher part from the right side | The nicer side shows on the outside of the bag |
| 4 | Add the flatter part on the wrong side and press | The two parts grip all layers |
| 5 | Give it a gentle tug | Shows whether it sits firmly or needs more attention |
Eyelets, also called grommets, are small metal rings you set into fabric or leather. They look neat, but they also do a job: they make a sturdy point where you can attach a handle, a chain with a carabiner, or a rope pulled through for a maritime style bag.
Screw-On or Press-On Eyelets
There are two common kinds. Screw-on eyelets are a bit more expensive and look very classy; you cut the hole, place the eyelet, pull the material over it and screw the two parts tight. Press-on eyelets come in two parts that are pressed together, either with eyelet pliers or with small teeth that you bend over with a hammer or pliers. Both rely on the same thing: precise marking and a clean hole.
What You Need
Eyelets of your choice, screw-on or press-on
A ballpoint pen or chalk pencil for marking
Hole punch pliers, or a punching iron with a hammer and a pad underneath
Small sharp scissors to clean up the hole
Eyelet pliers, or pliers and a hammer for press-on eyelets with teeth
A test piece with the same layers as your bag
Step by Step
Make a Test Piece First
Before you work on the bag, try one eyelet on a scrap that has the same layers as your bag. Layers behave differently: leather punches cleanly, while several fabric layers with a fluffy interfacing in between may not punch out completely on the first try.
Mark the Hole
Hold one part of the eyelet in place and trace the inner circle with a ballpoint pen. This line is what you will cut out, so take your time with it. On a bag, mark the center of each eyelet with a small cross and keep the spacing even.
Punch the Hole
Use hole punch pliers on the largest setting, or place a punching iron on the mark and strike it firmly with a hammer on a pad. If the hole does not come out completely, you can still see the circle the punch has pressed in. Simply cut along that line with small scissors.
Insert and Set the Eyelet
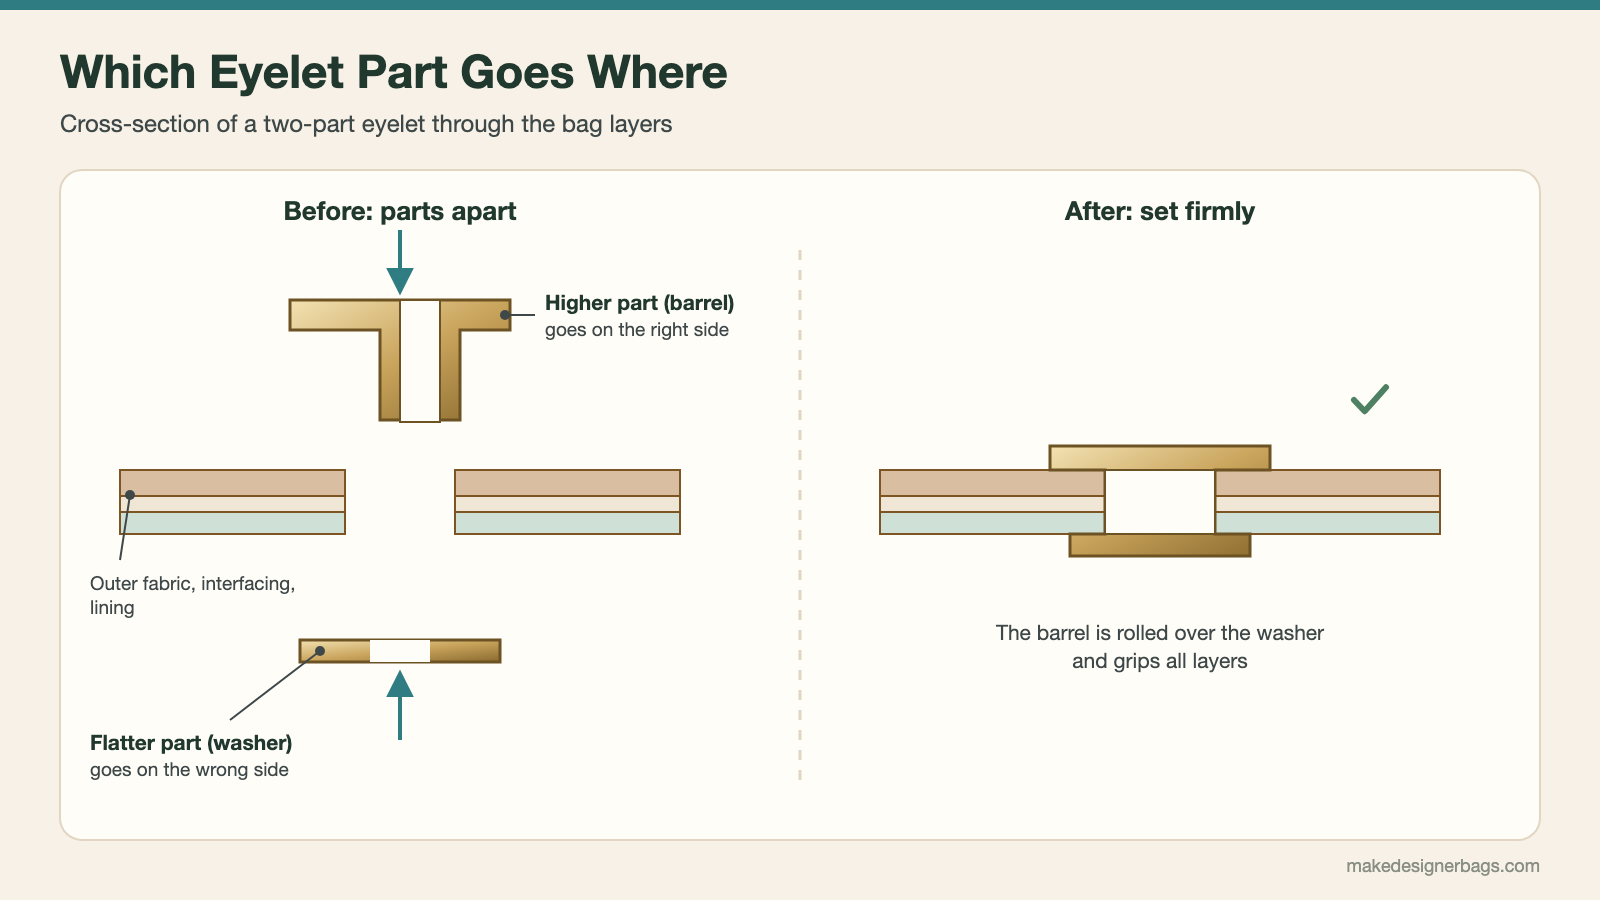
The two parts are always different. The higher part, the barrel, goes through the hole from the right side of the bag. The flatter part goes on the wrong side. With eyelet pliers, put the higher part in the top of the pliers and the flatter ring at the bottom, check that the hole is nice and round, then squeeze the handles firmly. With an eyelet that has teeth, place the toothed part on the right side, add the counterpart, put something soft underneath so nothing gets scratched, and bend the teeth over until they lie flat.
Check the Fit
Give the eyelet a gentle tug. If it feels loose or crooked, fix it now, before you attach a handle, chain or rope to it.
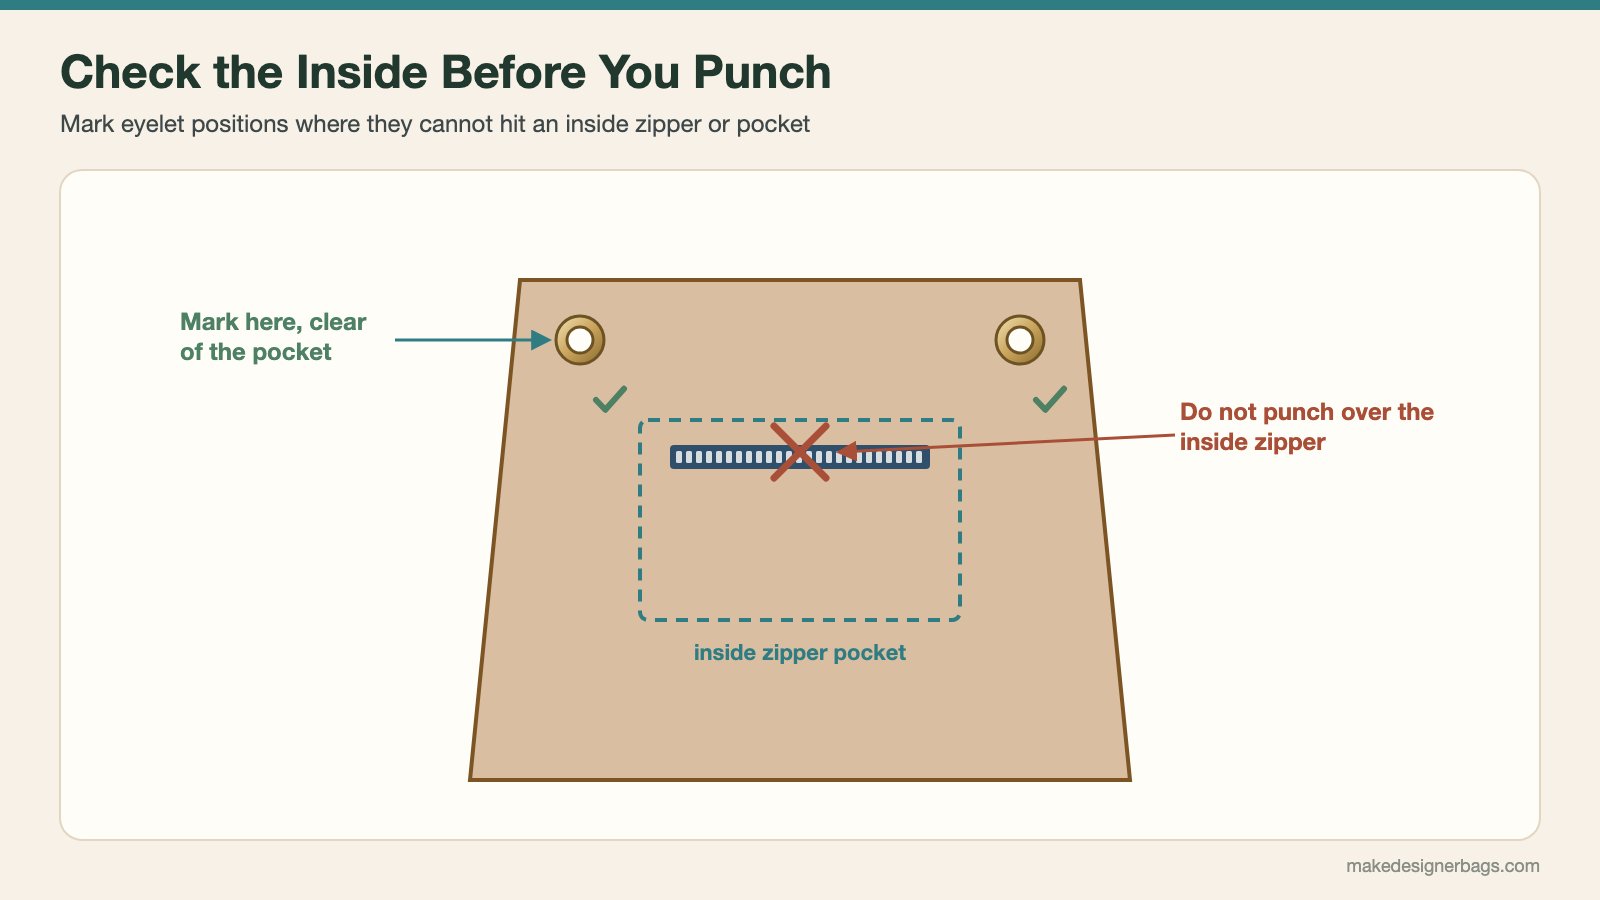
Before you mark eyelet positions on a bag, check for anything inside, such as the zipper of an inside pocket. Put the lining in place so nothing can shift while you punch.
Common Mistakes
The eyelet cannot sit securely in a ragged or oversized hole. Mark carefully and cut along the line.
On press-on eyelets with teeth, teeth that are not fully bent and flattened let the eyelet come loose.
Punching without checking the inside of the bag can hit an inside zipper. Skipping the fit check after setting can leave the eyelet loose or crooked.
Hardware like eyelets is one of the details that make a handmade bag look finished. For more on that, read what makes your handmade bag look elegant and luxurious.
See It on Video
Setting screw-on and press-on eyelets is shown step by step in close-up video in the Bag Sewing Fundamentals course. See the bag making courses.
Frequently Asked Questions
What is the difference between a grommet and an eyelet?
In bag making the two words are used for the same thing: a small metal ring set into fabric or leather to make a sturdy hole for a handle, chain or rope.
Which eyelet part goes on the outside of the bag?
The higher part, the barrel, goes through the hole from the right side. The flatter part goes on the wrong side, inside the bag.
What if the punch does not cut through all the layers?
That happens with several fabric layers, especially with a fluffy interfacing. You can still see the circle the punch pressed in, so cut along it with small scissors.
How do I know the eyelet is set properly?
Give it a gentle tug. If it feels loose or crooked, fix it before you attach a handle or chain.