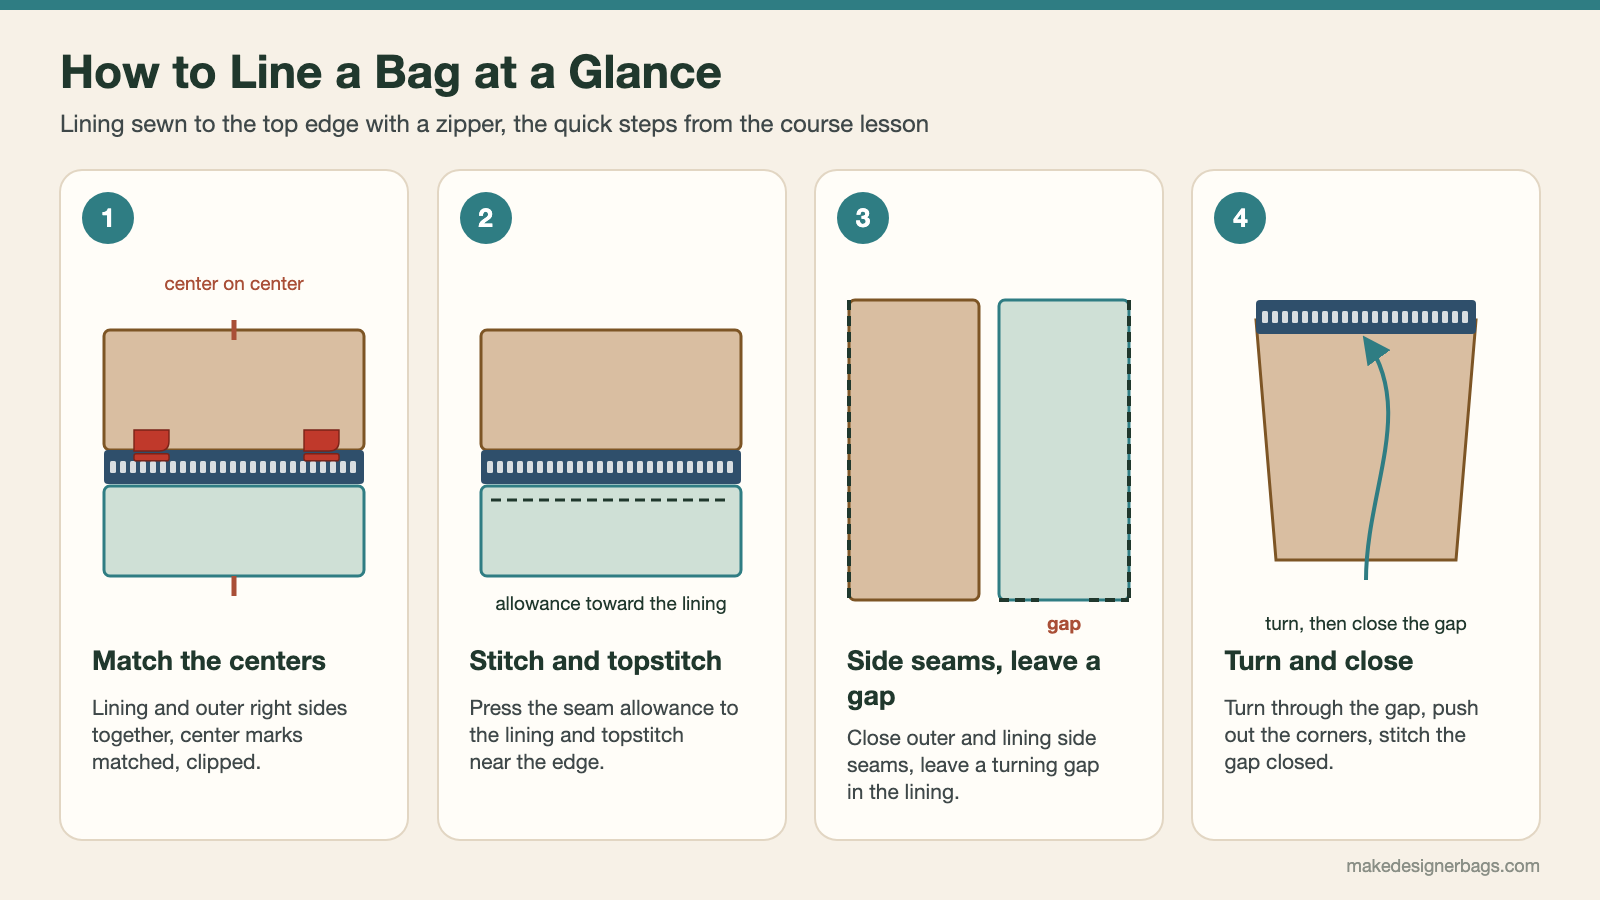
To line a bag with a zipper top, place the lining and outer bag right sides together with the zipper between them, match the center marks and stitch along the top edge. Press the seam allowance toward the lining and topstitch close to the edge. Then close the side seams of outer bag and lining, leave a turning gap in the lining bottom, turn the bag through it with the zipper open, and stitch the gap closed.
Lining a Bag at a Glance
| Step | What you do | Why it matters |
|---|---|---|
| 1 | Cut the lining like the main bag, with a bottom seam | The lining fits exactly and leaves room for a turning gap |
| 2 | Add pockets and the lanyard to the lining | They are hard to add later |
| 3 | Match the center marks and clip lining, zipper and outer fabric | Everything sits straight |
| 4 | Stitch, then topstitch the lining near the edge | The lining does not spill out when the zipper is open |
| 5 | Sew the side seams and corners, leave a gap in the lining | You need the gap to turn the bag |
| 6 | Turn with the zipper open, close the gap | A clean finish inside and out |
This is the method shown in our Bag Sewing Fundamentals course: the lining is sewn to the top edge of the bag and the bag closes with a zipper. It makes a loose lining that can be pulled out later.
What You Need
Outer bag pieces and a zipper, ready to sew
Lining pieces cut like the main bag, with a bottom seam
Wonder Clips and a few pins
Thread in matching colors for outer fabric and lining
A wooden board and a hammer for thick spots
Step by Step
Prepare the Lining
Cut the lining the same way as the main bag. Where the outer bag is cut on the fold, give the lining a bottom seam instead, because part of that seam stays open for turning. Sew the inside pockets and the key lanyard onto the lining now.
Join Lining and Zipper
Mark the top center of the lining and of the outer bag. Lay lining and outer fabric right sides together with the zipper between them, put the two center marks together and hold everything with clips. Stitch along the top edge. Sew slowly over the zipper teeth. With a continuous zipper that is not secured at the end, never pull the slider off, or you will have to make a new end.
Topstitch the Lining
Lay the whole seam allowance toward the lining and topstitch close to the edge. This keeps the lining from spilling out of the top of the bag when the zipper is open. Repeat on the other side.
Close the Side Seams
Lay the outer pieces right sides together and the lining pieces right sides together. Match the seams at the zipper exactly, with a pin placed across the seam so nothing slips. Match corners and center marks, then stitch the side seams. In the lining bottom, stitch only a short piece from each side and leave the middle open.
Turn and Finish
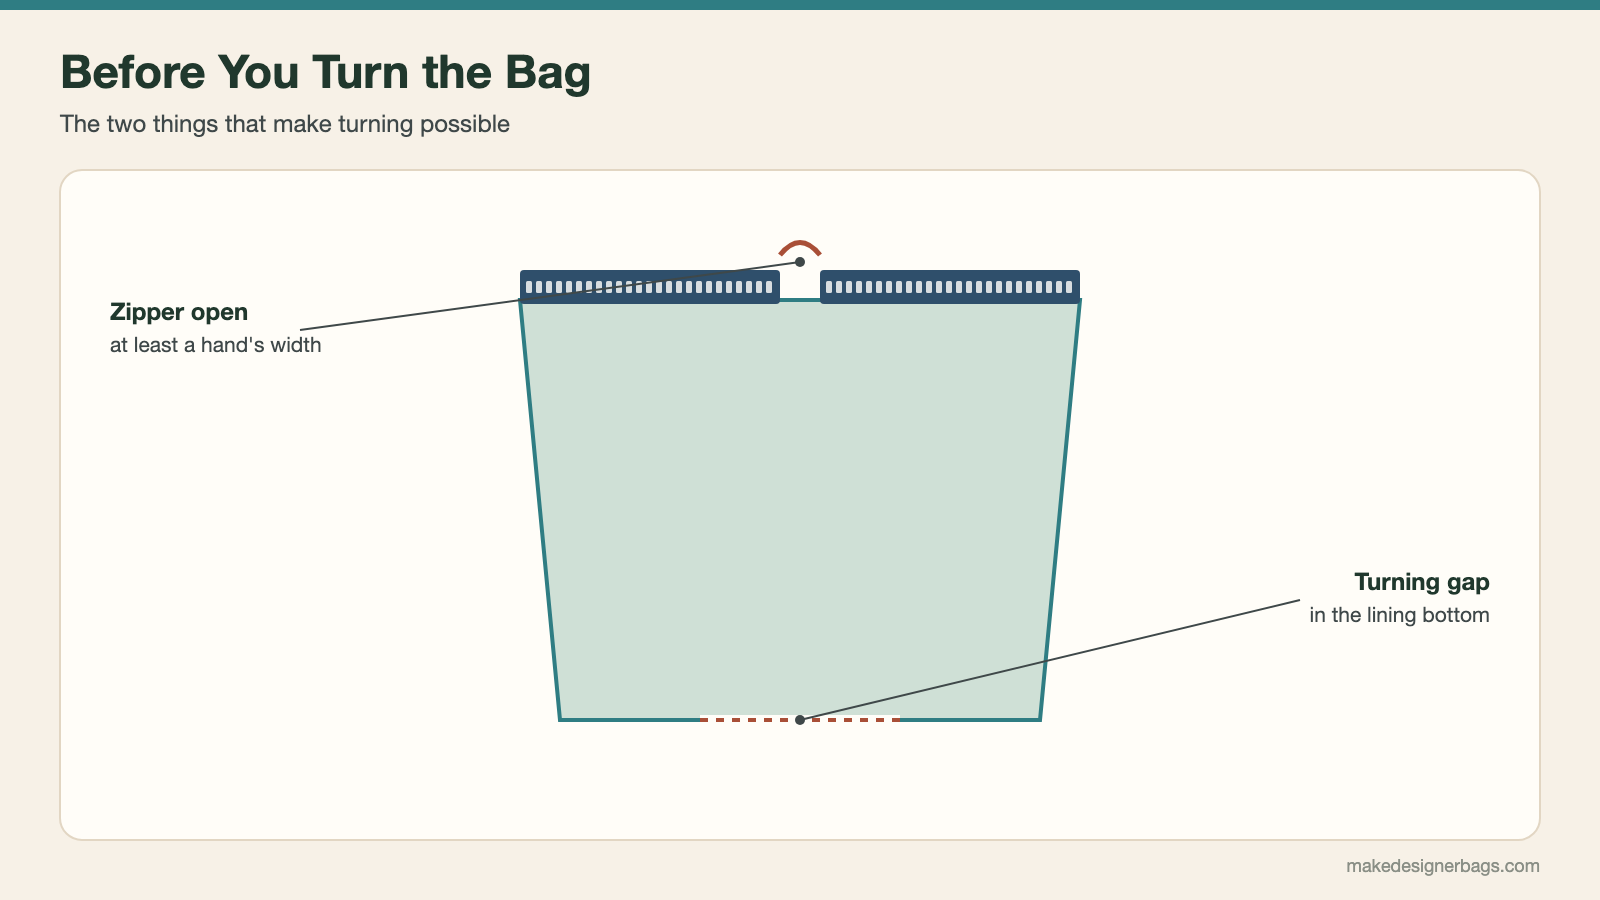
Stitch the corners of lining and outer bag. Reach through the gap in the lining and pull the whole bag through. Push the corners out, push the lining back inside and flatten the top edge. Pull the lining out once more, close the gap with a seam close to the edge and push it back in. If the top edge is thick at the zipper ends, lay it on a wooden board and tap it flat with a hammer from the lining side.
Keep the zipper open at least a hand's width before you turn the bag. With a closed zipper, turning is almost impossible.
Common Mistakes
The bag cannot pass through. Open the zipper before you sew the last seams.
If the center marks do not meet, the lining twists and the zipper sits crooked.
The lining then creeps out of the bag opening.
On a continuous zipper without a secured end, the slider comes off and the zipper is ruined.
The lining is only one part of a good inside; see what makes the perfect bag interior for pockets and organisation ideas.
See It on Video
Sewing a lining to the top edge of a bag is shown step by step in close-up video in the Bag Sewing Fundamentals course. See the bag making courses.
Frequently Asked Questions
How do you line a bag with a zipper?
Place lining and outer bag right sides together with the zipper between them, match the center marks and stitch the top edge. Topstitch the lining, close the side seams leaving a gap in the lining, turn the bag and close the gap.
Why leave a gap in the lining?
The bag is turned right side out through the gap in the lining bottom. Afterwards the gap is closed with a seam close to the edge.
How do I stop the lining from showing at the top of the bag?
Press the seam allowance toward the lining and topstitch close to the edge. The lining then stays inside when the zipper is open.
Why is my bag hard to turn?
Usually the zipper is closed. Keep it open at least a hand's width before you sew the last seams.