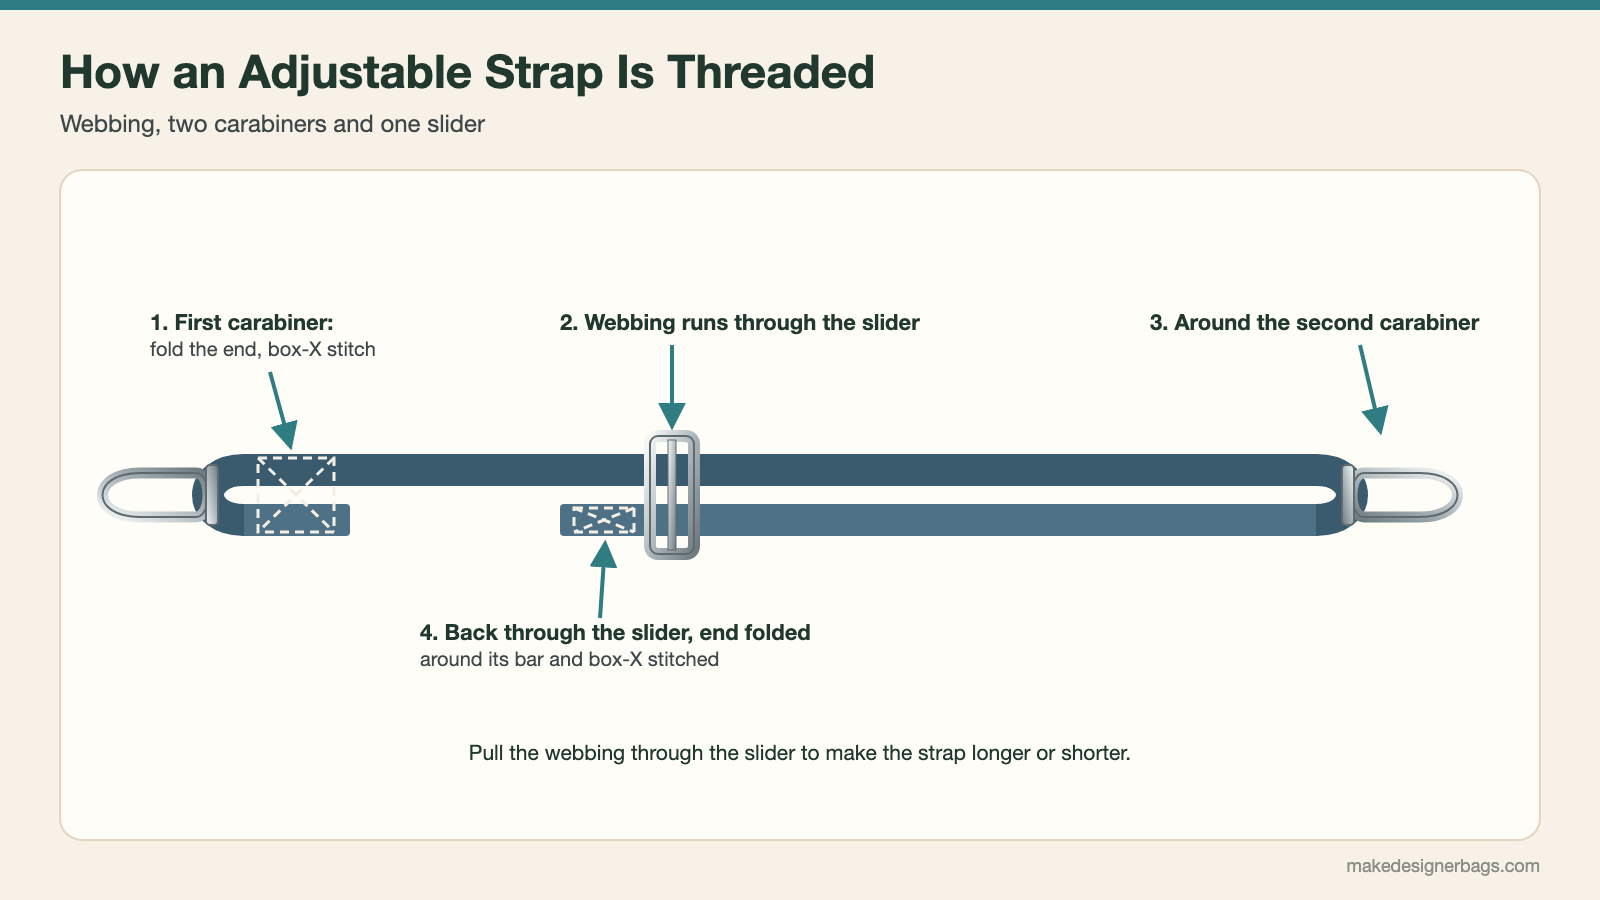
To make an adjustable bag strap, cut webbing to length and melt the ends so they cannot fray. Fold one end around a carabiner and stitch it with a square and a cross. Then thread the webbing through the slider, around the second carabiner and back through the slider, and stitch the end the same way. Pulling the webbing through the slider makes the strap longer or shorter.
Adjustable Strap at a Glance
| Part | What it does | Key point |
|---|---|---|
| Webbing | The strap itself | As wide as the bar of the carabiners and slider; ends melted |
| First carabiner | Fixed end of the strap | End folded and stitched with a box-X |
| Slider | Makes the strap adjustable | Webbing passes through it twice |
| Second carabiner | Moving loop of the strap | Webbing runs around it and back to the slider |
This kind of strap suits totes, travel bags and crossbody bags, and many other projects where comfort matters. Once you know the threading, you can add a flexible strap to almost any bag you sew.
What You Need
Webbing as wide as the bar of your carabiners and slider
Two carabiners
One metal slider in a matching color
A lighter to seal the ends
Wonder clips
Sewing thread that matches the webbing, and a larger stitch length
Step by Step
Seal the Ends
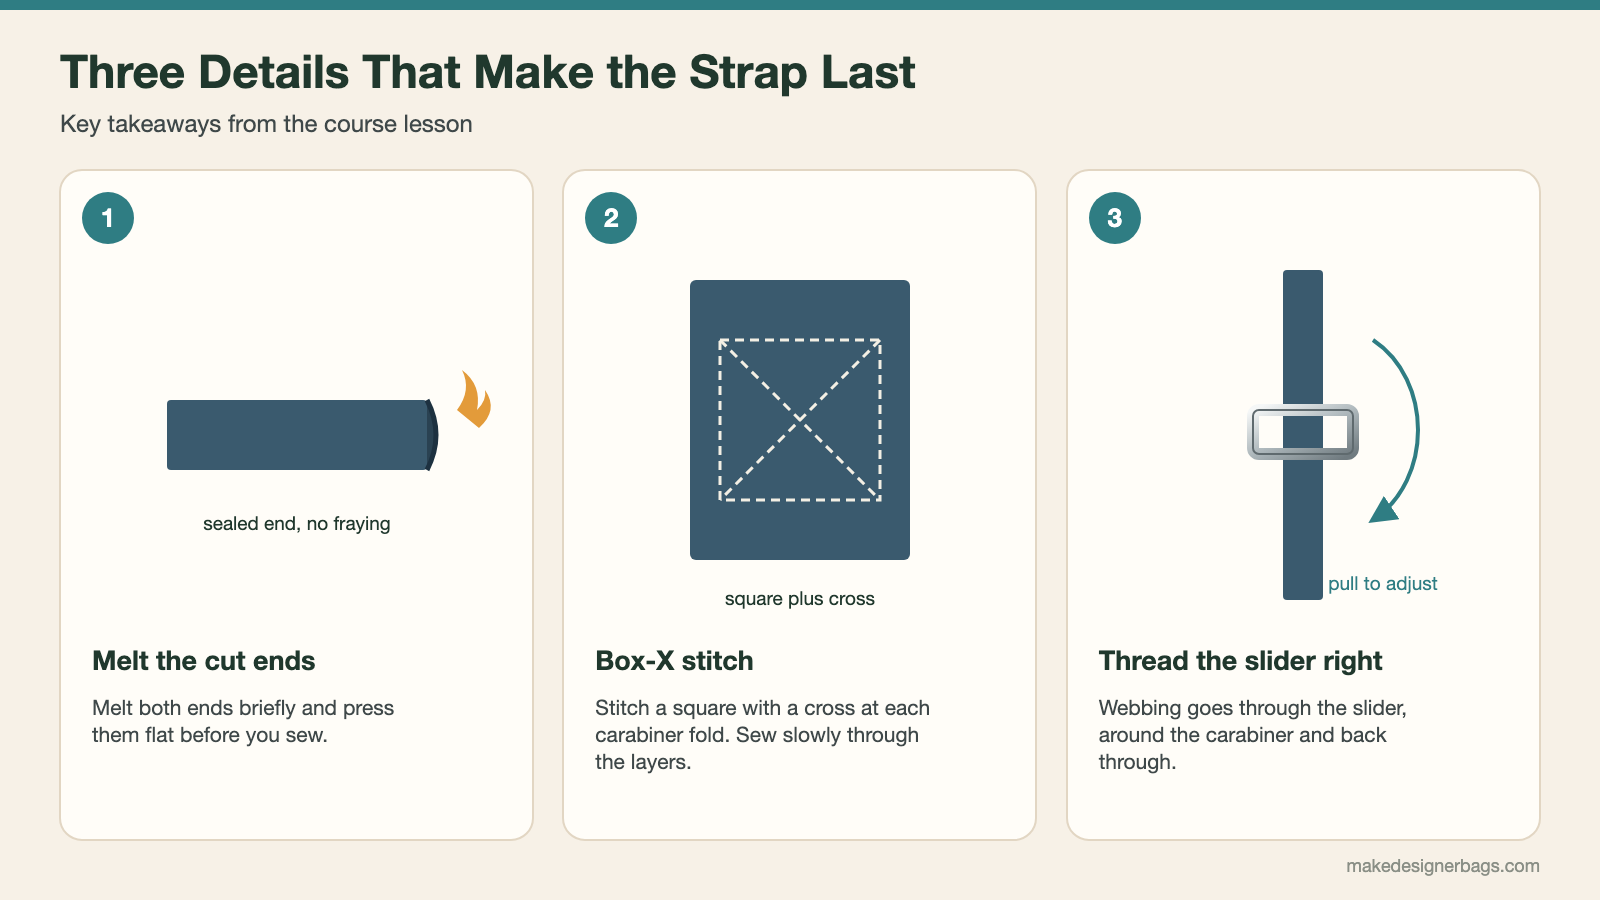
Cut the webbing to the length you want. Melt each cut end briefly with a lighter and press it flat. If something still sticks out, trim it away.
Attach the First Carabiner
Thread the first carabiner onto the webbing, fold the end in, fold it over again toward the carabiner and hold it with a clip. Stitch a small square, then add a cross through the corners for stability. The layers are thick here, so sew slowly so the needle does not break.
Thread the Slider and the Second Carabiner
Thread the free end of the webbing through the slider, then through the second carabiner, and back down through the slider over its bar. Pull the webbing through so the carabiner sits snugly.
Stitch the End
Fold the end of the webbing back toward the slider, clip it, and stitch a small rectangle with a diagonal cross, just like at the first carabiner. Cut the thread ends. Now you can pull the strap shorter or longer at the slider.
Melt the cut ends of the webbing before you sew. A sealed end does not fray with use.
Common Mistakes
Webbing that is cut but not melted frays over time.
Careless stitching at the carabiners and the slider makes the strap less secure and less adjustable. Use the square with a cross at both ends.
Sewing through several layers of webbing is easier with the right needle; see sewing machine needle basics.
See It on Video
Making an adjustable strap with a slider is shown step by step in close-up video in the Bag Sewing Fundamentals course. See the bag making courses.
Frequently Asked Questions
What do I need to make an adjustable bag strap?
Webbing, two carabiners and one slider, all with the same bar width, plus a lighter to seal the webbing ends.
How do you thread a strap slider?
Thread the webbing through the slider, around the second carabiner and back through the slider over its bar, then fold and stitch the end.
How do I stop webbing from fraying?
Melt each cut end briefly with a lighter and press it flat before you sew.
What stitch holds a strap to a carabiner?
A small square with a cross through the corners, often called a box-X. Sew it slowly through the folded layers.