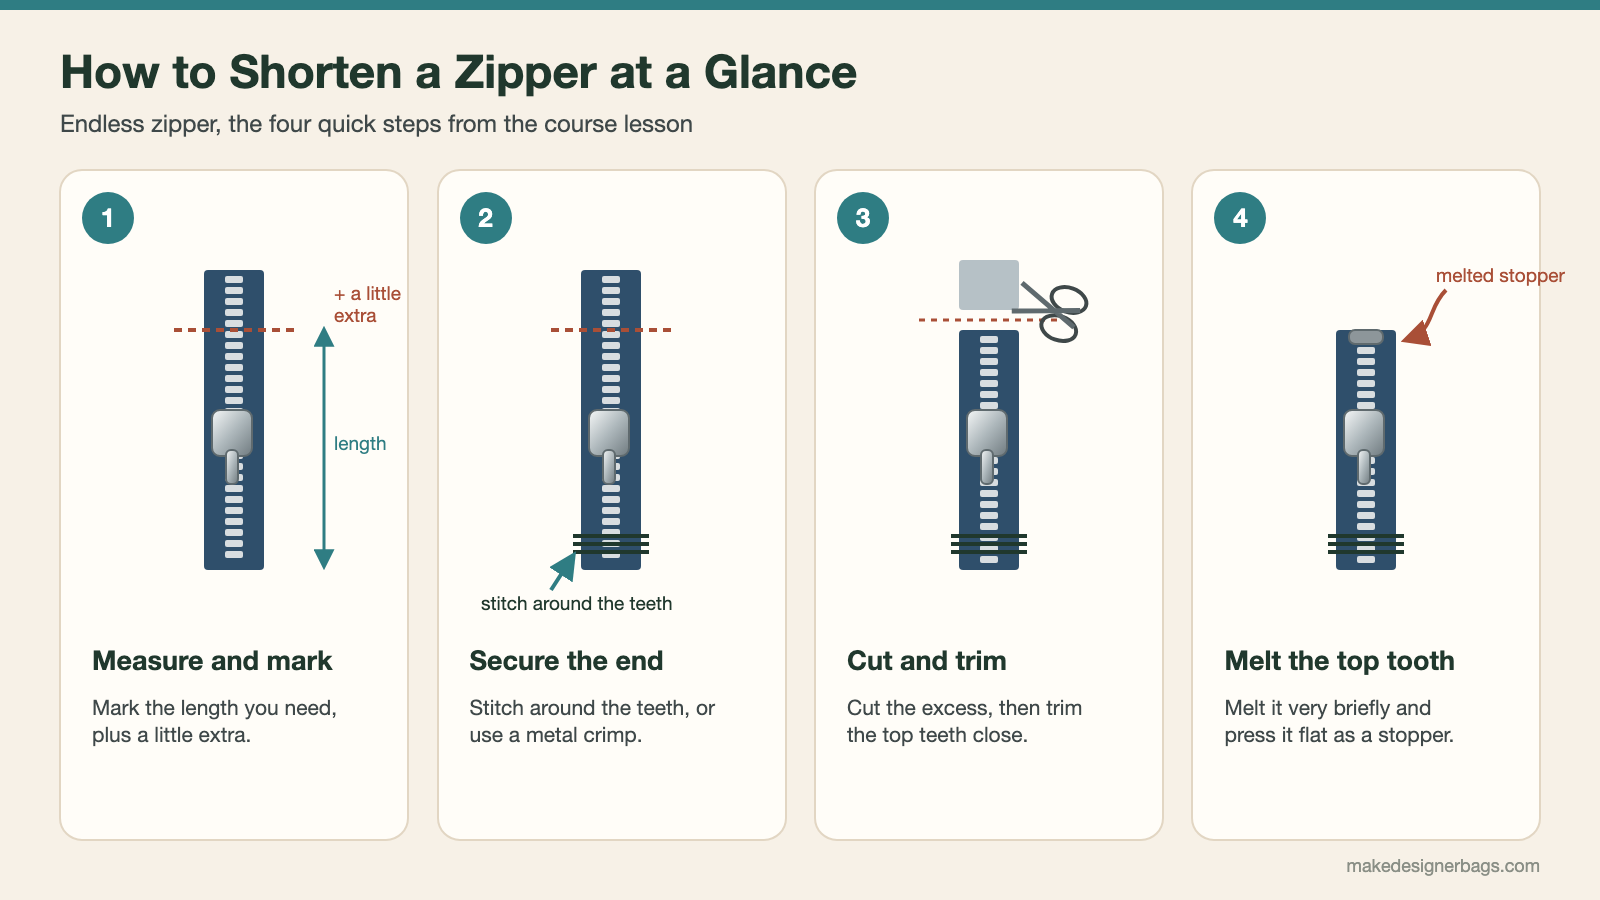
To shorten a zipper, mark the length you need plus a little extra, secure the zipper at that end by stitching around the teeth or adding a metal crimp, then cut off the excess. At the other end, trim the top teeth close, melt the top tooth very briefly and press it flat. That small melted stopper keeps the slider from slipping off.
Shortening a Zipper at a Glance
| Step | What you do | What it prevents |
|---|---|---|
| 1 | Measure, add a little extra, mark with chalk | A zipper that ends up too short |
| 2 | Stitch around the teeth or add a metal crimp | Teeth unthreading after the cut |
| 3 | Measure again, cut and trim the top teeth close | Teeth getting in the way when you sew |
| 4 | Melt the top tooth briefly and press it flat | The slider slipping off the end |
Many bags and pouches need a zipper of a very exact length. An endless zipper lets you cut exactly the length you need. But a zipper that is simply cut without preparation falls apart: the slider can run off the end, or the teeth come loose.
What You Need
An endless zipper with its slider already threaded
Chalk and a measuring tape
A hand sewing needle with double thread, or a metal crimp
Sharp scissors
A lighter and a screwdriver to press the melted tooth flat
Step by Step
Measure and Mark
Measure the length your project actually needs and mark it on the zipper tape with chalk. Then add a little extra beyond the mark. The extra room gives you space to adjust before the final cut.
Secure the End
Before you cut, stop the teeth from unthreading. If you have a metal crimp, put it on. If not, take a double-threaded needle and sew around the teeth three times right at the mark. Finish with a buttonhole stitch on both sides so the thread is well secured, then cut the thread.
Cut and Trim
Measure again from the secured end to confirm the length and mark it once more. Open the zipper and cut off the excess above the mark, leaving a little room. Then cut very close along the teeth at the top on both sides, so loose teeth cannot get in the way when you sew the zipper in.
Melt the Top Tooth
Take a lighter and melt the top tooth very briefly and carefully, then press the soft plastic flat with a screwdriver so the teeth fuse together. Do the same on the other side. Keep it short so nothing burns or turns brown.
Always add a little extra before cutting. You can still trim a zipper that is slightly long, but you cannot add length back.
Common Mistakes
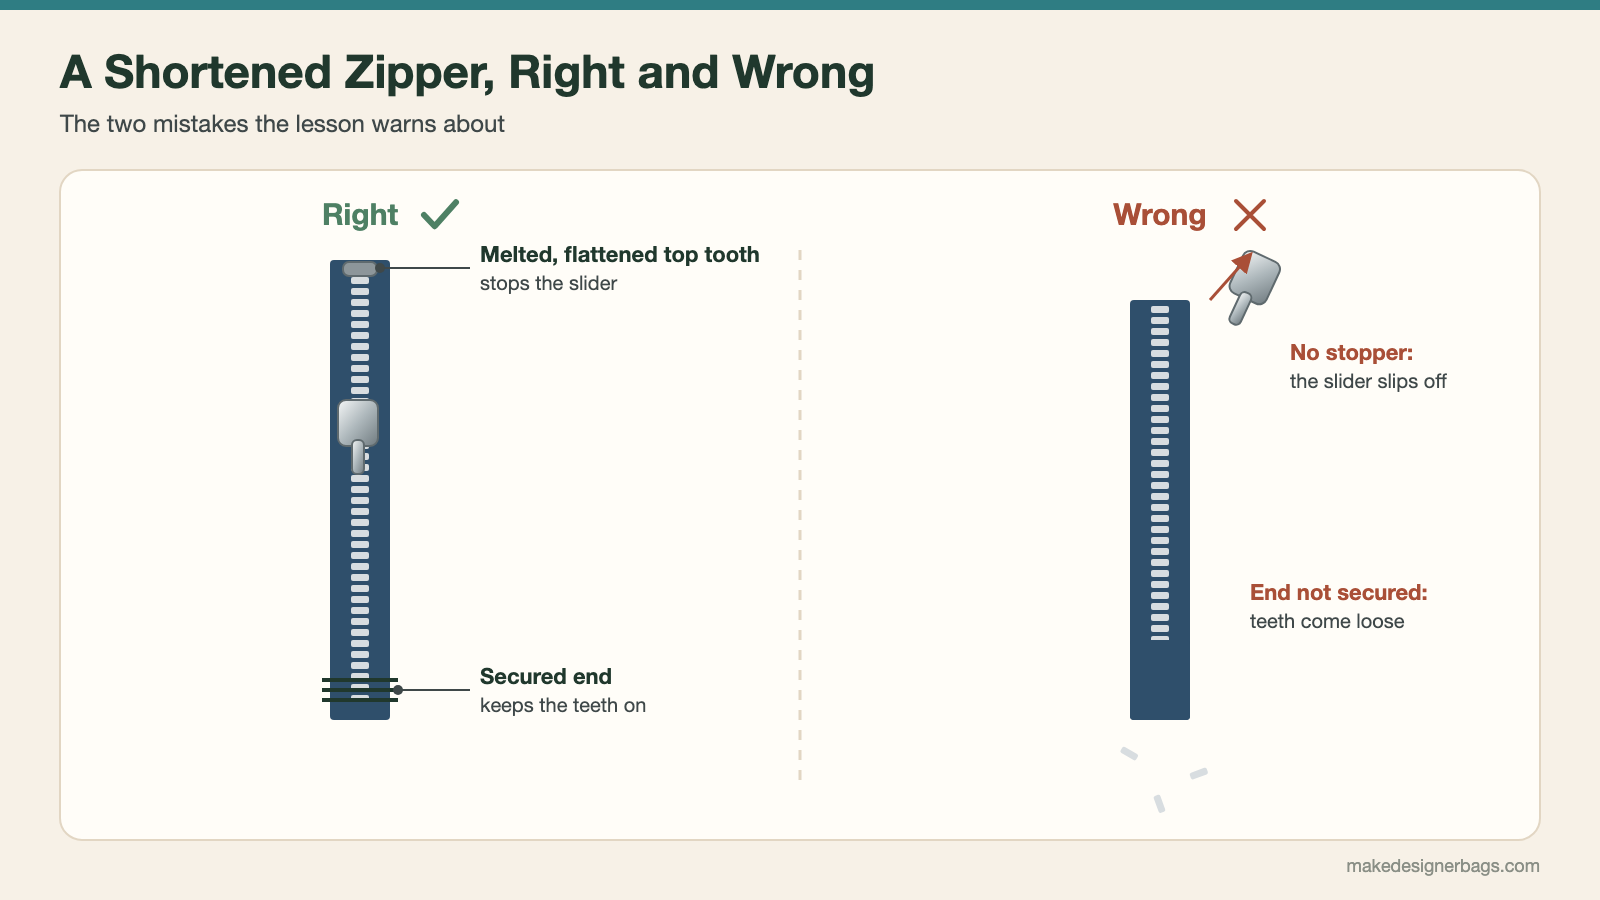
If you cut the zipper before stitching or crimping the end, the teeth can unthread and the zipper falls apart.
Without the melted, flattened top tooth, the slider can slip off the top of the zipper.
Once the zipper is the right length, it is ready to be sewn in. Choosing the right thread helps too; see which sewing thread size suits your sewing machine.
See It on Video
Shortening an endless zipper is shown step by step in close-up video in the Bag Sewing Fundamentals course. See the bag making courses.
Frequently Asked Questions
Can you shorten any zipper?
This method is for endless zippers with plastic teeth, which you cut to length and then secure. The lesson melts the top plastic tooth to make a stopper.
How do I stop the zipper from unthreading after cutting?
Secure it before you cut: add a metal crimp, or sew around the teeth three times with a double-threaded needle and finish with a buttonhole stitch.
Why does the slider come off a shortened zipper?
Because the top end has no stopper. Melt the top tooth very briefly and press it flat on both sides so the slider cannot slip out.
Should I cut the zipper to the exact length?
Mark the length you need and add a little extra first. The extra room lets you adjust before the final cut.